- Other Fluke companies:
- Fluke
- Fluke Biomedical
- Fluke Networks
- Fluke Process Instruments
How to automate calibration of analog output pressure transmitters
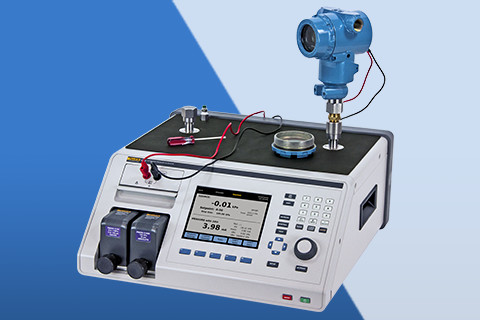
Pressure transmitters are used in mission-critical applications such as determining the flow of fluids through a pipeline or ensuring process integrity in a process plant. Process professionals must test and calibrate these pressure transmitters regularly to ensure that they are functioning properly and within specification.
In this example, we use the Fluke Calibration 2271A Industrial Pressure Calibrator to automate testing and calibration of pressure transmitters from 10 in of water to 3000 psi.
Set up the equipment
- Connect the transmitter to the calibrator. The specifications for connecting any specific transmitter may vary by manufacturer. Check the documentation provided with the transmitter for detailed directions.
- Validate that you have made the electrical connections properly.
Set up the program
- Press the F3 key to access the programmable tasks.
- Use the jog wheel or arrow keys to highlight Transmitter and press Enter. The Transmitter Task screen appears. This is where you can choose an existing program or create a new one.
- Use the jog wheel to select New, then press Enter. The Keyboard screen appears.
- Enter a name for the procedure and press F3 to save the name. A screen for entering pressure points appears.
- Enter the starting and ending procedure and the number of points in each direction. You can also specify a dwell time to set the amount of time after the controller is ready at a set point before it records the reading. You can also set the maximum time to get to a set point before the controller reports an error.
Set up the device under test
Configure the device under test (DUT) so that its output will be collected and analyzed automatically.
- Use the jog wheel to highlight DUT on the Transmitter Task screen.
- Enter the zero and full-scale values for the transmitter.
- Specify a pass/fail tolerance, as a percentage of reading, percentage of span, or in the selected pressure units.
- Set Closed Loop to On for a fully automated test.
- Press F2 to go back to the Transmitter Task screen.
Run the procedure
- From the Transmitter Task screen, select the correct procedure from the list and press F4 to bring up the Keyboard screen.
- Enter the ID for the DUT and press F3 to start the calibration process. The program goes to each requested setpoint, dwells for the specified time, and then collects data.
View the results
- Connect the calibrator to a computer using a USB-A-to-USB-B cable.
- Toggle RS-232 mode off in the SETUP|Instrument Setup|Remote Port|USB setup menu. The 2271A appears as a drive on the computer
- Copy the results file from the calibrator onto the computer.
Recommended Products
2271A Industrial Pressure Calibrator
Recommended Resources
- Home
- Products
- New Products
- Electrical Calibration
- RF Calibration
- Data Acquisition and Test Equipment
- Temperature Calibration
- Humidity Calibration
- Pressure Calibration
- Flow Calibration
- Process Calibration Tools
- Calibration Software
- Service and Support
- All Calibration Instruments
- Purchase Info
- News
- Training and Events
- Literature and Education
- Service and Support
- Service Request (RMA)
- Service Plans
- Technical Support
- Knowledge Base
- Accreditations
- Authorized Service Centers
- Calibration Certificates
- Community Forum
- My MET/SUPPORT
- Product Manuals (User Guides)
- Register Products
- Safety Data Sheets (SDS)
- Safety, Service, and Product Notices
- Software Downloads
- Tools
- About Us

We'd like your feedback.
You can help us improve our website »
Thank you!
If you purchased an item from a Fluke authorized distributor, please contact them directly with questions regarding Certificates of Calibration or other documentation.
Support requests for items purchased from, or serviced directly by Fluke and general Metrology questions can be submitted via our online Support Request form and a Fluke representative will be in contact with you.